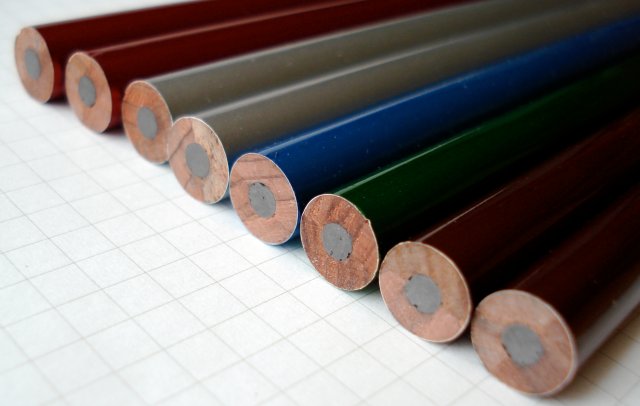
The pencil talk laboratories took delivery of some Ito-ya pencils just over a year ago, and discovered that they were excellent for a house brand pencil. Of course the world’s largest stationery store is no ordinary “house”!
Ito-ya’s jumbo pencil is more than just a variant of the standard sized version.
Available in five very rich solid metallic finishes, the pencil presents itself very well.
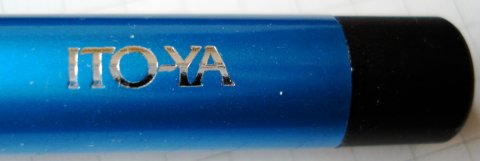
To start with, the cap is a metal attachment painted black, not an eraser. I am so used to the regular sized pencils that I kept trying to use it as an eraser!
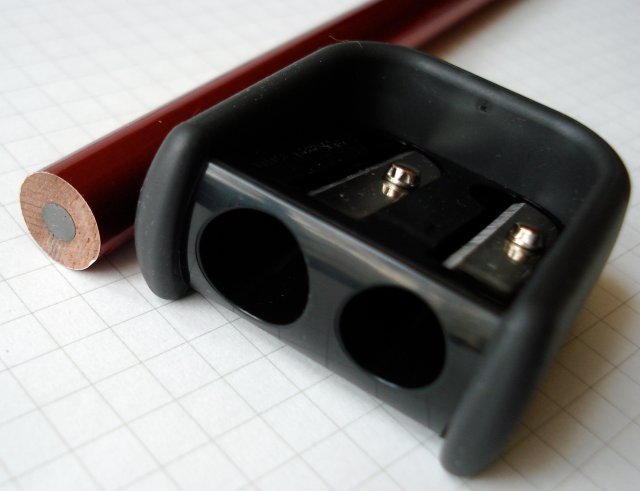
In a Faber-Castell rubberized Contour sharpener, sharpening this pencil is a joy. (And this is not the best sharpener.)
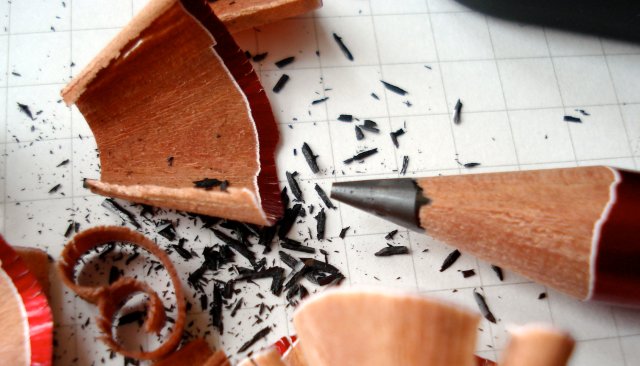
The cedar is just super straight grained, soft, and easy to sharpen. The pencil isn’t cheap, and the choice of wood must have been part of the cost equation.
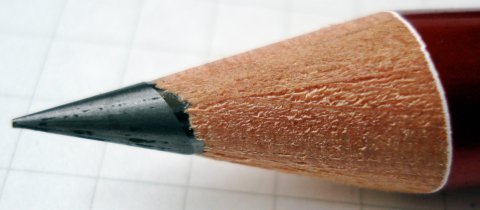
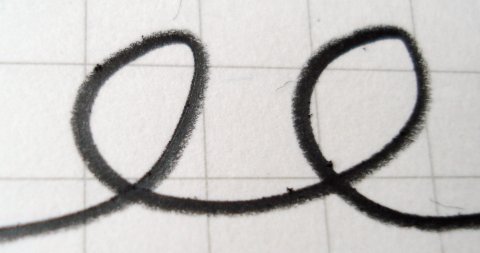
The lead isn’t that of the regular pencil – it is a super dark and rich lead (a bit hard to erase) that might have some darkening ingredients apart from graphite.
All in all, a superb example of a jumbo or oversized pencil.

Hmm, something else to keep in mind next time I get a chance to visit a Japanese stationery store.
Hi, can I ask a slightly OT question?
Your photographs on this post, as on every other post, are excellent. I was trying to take a picture of some of my pencils a few days ago but the results I achieved were nothing like as good as yours.
Any hints/advice/instructions on how to photograph a pencil? Perhaps this is a blog-post on its own?
Hi Botogol, thanks for the praise. Alas, I doubt I’m the one to ask. Around the web, there are many photographers much more capable than myself.
What I’ll say is that if you have a compact camera, try and locate the macro setting – that is vital for close up photos of small objects. You may have to consult the manual to find it.
Next (and I’m not properly doing this myself) is lighting. Ideally you would have two carefully positioned lamps illuminating the pencils, with a light cloth or piece of paper possibly shielding or shrouding the subjects from the direct light. You can buy such setups or assemble one yourself. I don’t really have such a setup – the above photos were taken just in natural sunlight.
Maybe someone out there can share some tips?
It’s generally a good idea, if you’re not an experienced product photographer, to keep the light diffused. That can be done simply with a piece of paper–way too many people jump for lightboxes they don’t need thinking it’ll fix everything.
Ideally you’ll want lighting with a fairly complete spectrum. While it’s POSSIBLE to take good photos under energy-saving compact fluorescent bulbs, it is fairly difficult. Sunlight is really the way to go for most people. In lieu of directly diffusing the light (putting something between light source and the subject), some photographers enjoy using a north-facing window, with a piece of paper on the opposite side to reflect light back onto the shadows, making them softer. If it’s slightly overcast, nature has provided you with a diffuser and you probably don’t need to supply your own. Also, white balance settings in the camera can help make your colors more accurate, which is important. Not all cameras let you control this though, so it might be a good idea to put something of a neutral gray (as colorless as possible–superwhite paper is actually a little blue) in the frame and use software to choose that as a “white balance reference”. Even the rudimentary photo editor in Windows 7 has a tool that does this to fix color. It can be a huge help, if you find your photos are all too blue or too yellow/orange.
I’ll second penciladmin’s suggestion to look for the macro setting. It’s represented by a little flower icon on nearly all cameras. You will still need to respect the minimum focusing distance of the lens.
Another thing a lot of people don’t think about is using a tripod or other method to brace the camera. In a modestly lit indoor room or even in what seems like a fairly bright window, sometimes there’s just not enough light to support quick shutter speeds. When the camera has to shoot with a long exposure time, both the camera and the subject need to be perfectly still to avoid motion blur. Otherwise, the camera needs to increase its sensor sensitivity (its ISO setting) to compensate, and that causes image noise that you don’t want. You want the ISO setting to be as low as possible, if you can set it yourself. If you cannot set it yourself, you will need to ensure there’s plenty of light. If the light is direct, diffuse it as I mentioned above, so shadows won’t be too contrasty and harsh.
So 3 things to pay attention to: exposure (how bright/dark the photo is), color accuracy (white balance), and blur (from focus distance or from motion). Hope that’s a helpful start. Even very modest point and shoot cameras can take very decent photos if used with decent technique. It takes a little bit of experimenting and practice, but it is quite simple after a while, even for novices.
Apologies, didn’t mean Windows 7, I meant Microsoft Office’s Picture Manager, which has a tool for correcting color. GIMP and Photoshop and other software also do, but it’s not always easy to find (often in “levels” or “curves” settings, typically with 3 eyedropper icons for setting black, white, and gray, with only the last being of significance for basic color accuracy).
Hello, I have been trying to find some of those fabulous Ito-ya Jumbo pencils. I would love to try one, could you please let me know where you found them?
Thank you!
LJ, thank you for your comment. I wish I had access to more of these!
Please note that this post is from 2010. I asked someone who visited the Ginza area back then to buy and mail the pencils to me. I only wish that they were a routine purchase.
It looks like they were only briefly available. Jumbo pencils often have cheaper finishes/leads/grades of wood – but these were uncompromisingly good!
Well that is terribly unfortunate. Did you happen to have a chance to compare the core to the current Helvetica by Ito-ya? Are they similar? If not what pencil do you think has a similar core?
Thanks for the reply!
LJ, I have used the regular Ito-ya brand – I am not sure if that is the same as the Helvetica line, and also the Romeo Ito-ya pencils. I am sorry, but I’d really need the whole set in front of me to make comparisons, and they’ve mostly been given away.